3-10-3
Release 3-10-3
1. Fuel Module Enhancement:
this module is responsible for tracking fuel usage in the fleet. no matter what source of fuel measuring the vehicle is using, this module facilitates tracking fuel consumption, level, percentage, and other related info.
like any other module, you need to grant fuel module to the vehicles of interests so they can appear in fuel related pages (fuel configuration and fuel explorer). however, the most important point of granting the fuel module is to have the fuel usage on the trips page. unless the vehicle has the fuel module, its fuel usage on the trips page is N/A.
after giving the module to a vehicle, you can set the desired configurations in the vehicle configuration page of the fuel module configuration.
- Fuel Module Configuration:
this section enables the admin of setting up the general fuel configuration of his/her company. it includes settings on the company level and on the vehicle level.
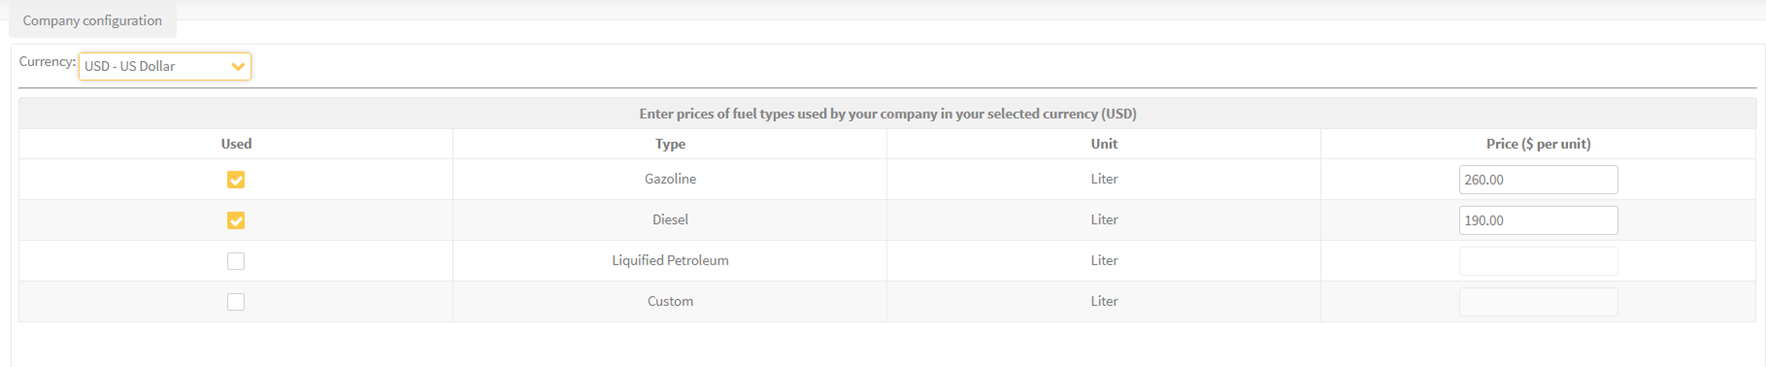
- ++company configuration:++
this’s to choose what types of fuel the company uses and the price of each unit type.
- ++vehicle configuration:++
here the admin can set the appropriate configuration of each vehicle. the available configurations are:
⛽ basic configurations: which includes:
- Fuel Type: to specify the type of fuel this vehicle uses.
- Tank Size: to specify the size of the vehicle tank.

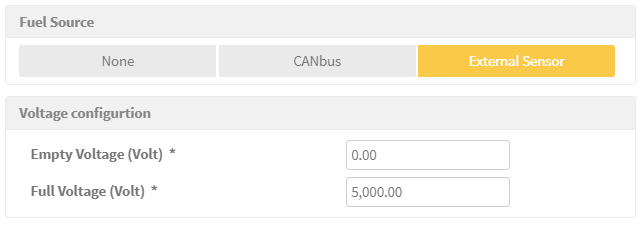
⛽ Fuel Source: to choose whether the fuel info of this vehicle is coming from the CANbus or some fuel sensor. the choice here affects the next set of configurations.

hence, if the fuel source is an external sensor, then you’ll have to set the voltage configurations. whereas, if the source is CANbus, you’ll have to set the CANbus extra configurations.
⛽ Voltage Configuration: is used when the source of the fuel is an external sensor. the user is asked to set the voltage corresponding to the empty tank and the voltage corresponding to the full tank.
⛽ CANbus Extra Configuration: as the name implies, those configurations are optional. if you check any of them, then you are asking to display the values received from the CANBus as is without any processing or validation. if you leave the default CANBUS Extra Configurations, then the system keeps monitoring and validating the received values to prevent having anomalous values. you should pay attention not to edit the configurations of a moving vehicle as the fuel usage of the ongoing trip will be affected.
⚠ ++Caution++ : when you decide to select to “Use CANbus provided total fuel used ”, the system will use the “total fuel used” value provided by the vehicle in all parts of the system that needs to do some calculations on the fuel. thus, if the vehicle wasn’t sending this value correctly, all fuel values in the system will be affected.

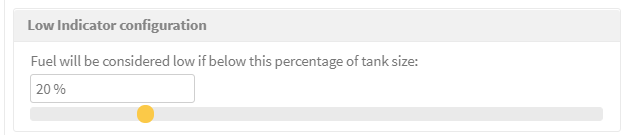
⛽ Low Indicator Configuration: is to specify the percentage of the full tank at which if the fuel decreases, the indicator of fuel decrease in the fuel explorer becomes true. this helps the admin to have a quick check on what vehicles need to be filled up.
⛽ Fuel Level Correction: this’s very important to achieve as accurate fuel values as possible. if it’s enabled, the system keeps monitoring the fuel level coming from the vehicle and prevents it from exceeding the Fuel min fill threshold (which represents the minimum amount for tank filling) set in the configurations. this enables the admin to decide if the vehicle was filling up the tank or it just was driven on a rugged road.

- Fuel Explorer:
it enables you of exploring the fuel data available for each vehicle. starting from the “total fuel used” (whether you choose to display the CANBus value as is or not), to the “fuel consumption per 100 km”, to the last “fuel level” the system received, to fuel percentage, total idle fuel used, fuel low indicator (to tell if the vehicle needs to be filled up), the distance(range) that can be traveled with the current fuel level, and finally the fuel change history.

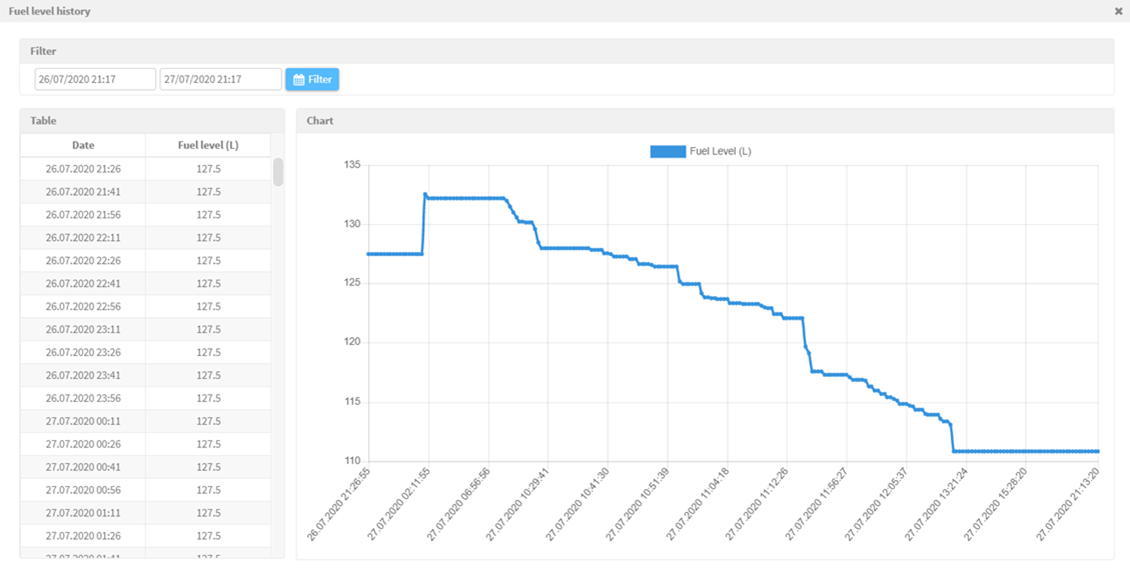
- ++Fuel History:++
this enables you to monitor the fuel level with each message received at the system. you can watch the decreases represented via the graph and check if there’s abnormal behavior in the fuel level changes.
2. Wasl For Individuals:
now it’s possible to register individual’s companies in Wasl platform. You only need to provide the required data and here we go!
3. New Devices Added:
We added the two Teltonika FMM125/FMM130 devices to our system and reserved the port 8028 for FMM125 and port 8029 for FMM130.
4. Orbcomm service:
As keep monitoring vehicles under any circumstance becoming essential day after day, especially in wide desert regions like the Gulf region, we are glad to announce that our system now is integrated with the Orbcomm platform which provides the communication with the vehicles over satellites via Orbcomm devices.
Once the vehicle has an Orbcomm device as a secondary AVL, it can take advantage of the features provided by this service.
This service allows the admin to request the location of the vehicles when they are in remote areas and when no GPRS coverage is available. On top of that, Orbcomm devices are supplied by many digital IOs that can be connected to many peripheral — most importantly, panic buttons. This increases the driver safety especially in such out of GPRS coverage areas.
++Service user guide++ ++:++
accessing this service is done via several steps. Please, bear with us in the following. It’s meant to be a secured process, as satellite communication applies extra charge on the admin.
- First of all, the partner grants the Orbcomm module to the companies that have Orbcomm devices.
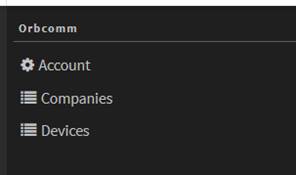
- Then, from Orbcomm tab, the partner can access Orbcomm service management to register Orbcomm devices and the target companies in Orbcomm service.
-
-
- Now, when registering a company in Orbcomm service, the partner needs to set the license of this company. the license includes the max number of location requests that the company can send to the vehicles per day. The partner will have an agreement on this license with the company according to the additional cost communication via satellites might imply.
-

- From devices page in Orbcomm tab, the partner can register (add) the Orbcomm devices.
At this stage, the partner is accomplished his/her role. Now, it’s the company’s admin responsibility to continue the registration steps.
-
From the company admin account => management tab => the admin assigns Orbcomm module to the vehicles that have Orbcomm device (as a secondary device)
-
From Orbcomm tab => vehicles page => the admin registers the vehicles in Orbcomm service and sets the communication threshold of this vehicle.
Communication threshold may differ between vehicles according to their field of work and it stands for the maximum allowed time for not receiving from the vehicle. After this time, a “missing communication” alarm will be fired if no message is received.

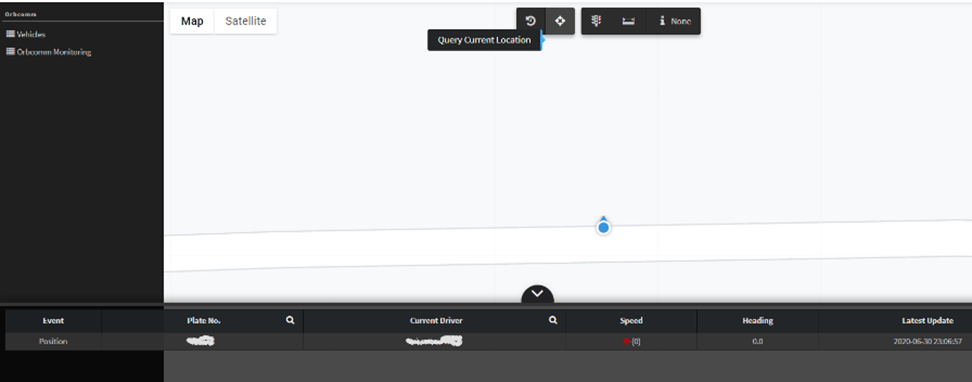
- Now, we are done and good to go to monitor the vehicles from Orbcomm monitoring page.
To request the current location of the vehicle, click on the vehicle icon, a new tools bar will appear in the above side of the map. Click “query current location” and wait for the update.
5. RAG Report:
This report aims of measuring drivers’ performance and classify them in colors according to their scores.
Colors thresholds are user-defined. however, standard RAG with all violations selected implies that Green drivers are drivers with scores less than 1, Amber is for drivers with scores greater than or equal to 1 and less than 3, while Red is for drivers with scores greater than or equal to 3.
The final score = acceleration per 100 Km + deceleration per 100 Km + seconds speed per 10 Km + seat belt violation
-
Seatbelt violation score is built based on “driver seatbelt” alarms conditions
-
Overspeed violation score is built based on the speed limit set in the vehicle properties
-
Acceleration and deceleration are device-based events
the report gives you the following flexibility:
- You are free to choose which violations to be considered in the formula. Deselected violations will be considered as zero.
- You are free to set the limits of the colors
- You are free to order the scores ascending or descending.
- You are free to get your result filtered by drivers or by vehicles
- And most importantly, you can save your report parameters to create scheduled reports to be sent to your inbox on a period of your own.
6. Vehicle Out Of Work Zone Report:
This report enables you to check the vehicles that have been driven out of the approved areas at a time out of the specified working hours. The report is built on the basis of the alarm condition “Distance out working places and hours”.
Make sure you have set the mentioned alarm condition appropriately. Then the report will give you the details about each violation of this type recorded on each vehicle.
7. Vehicle Driving Violations:
This report aims of showing you the violations of resting criteria done on the vehicles. The report is built on three alarms conditions: Out of Working Hours, Excessive driving distance, and Excessive driving workload.
for your convenience, the report is equipped with advanced filters. you can filter on the duration and/or the distance of your interest. You can choose to generate the report for one violation only or for all of them.
8. Driver Driving Violations:
This report aims of showing you the violations of resting criteria done by the drivers. Just like the report “vehicle driving violations”, The report is built on the three alarms conditions: Out of Working Hours, Excessive driving distance, and Excessive driving workload.
You can choose the report to be generated for one driver or for a group of drivers. And again, you can filter on the duration and/or the distance of your interest in addition to the ability of generating the report for one violation only or for all of them.
9. Vehicle Trips Report
this report is responsible for showing all trips traveled by the vehicles on a period of up to 3 months. You can aggregate your search on a daily basis, a monthly basis, or the whole period.
10. Driver Trips Reports:
this report is responsible for showing all trips traveled by the drivers on a period of up to 3 months. You can aggregate your search on a daily basis, a monthly basis, or the whole period.
11. Fixes and enhancement in this release:
-
-
-
The system now can detect the type of the devices automatically according to the port they’re sending to. This highly protects the customer business from bad device configuration and its consequences.
-
Some other minor issues.
-
-