5-2-0
Release 5.2.0
in this release we intoduce some new enhancements
- Shareable Monitoring Link ============================
Now you can get a sharable link for a vehicle, some selected vehicles on the map, or any level of your interest. The link you get is public and can be used by anyone without the need for them to have an account or an access to your account.
To get advantage of this feature, you need first to make sure that you have the corresoonding permissin from the partner, then you are good to got to generate a shareabe link via one of the following methods:
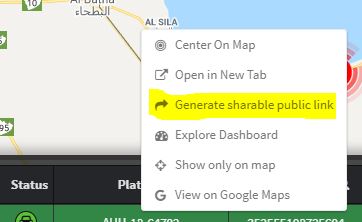
a. From the messages table: by right-clicking on any vehicle, you get a list of options amongst which you can find the option of generating a public link — as shown below
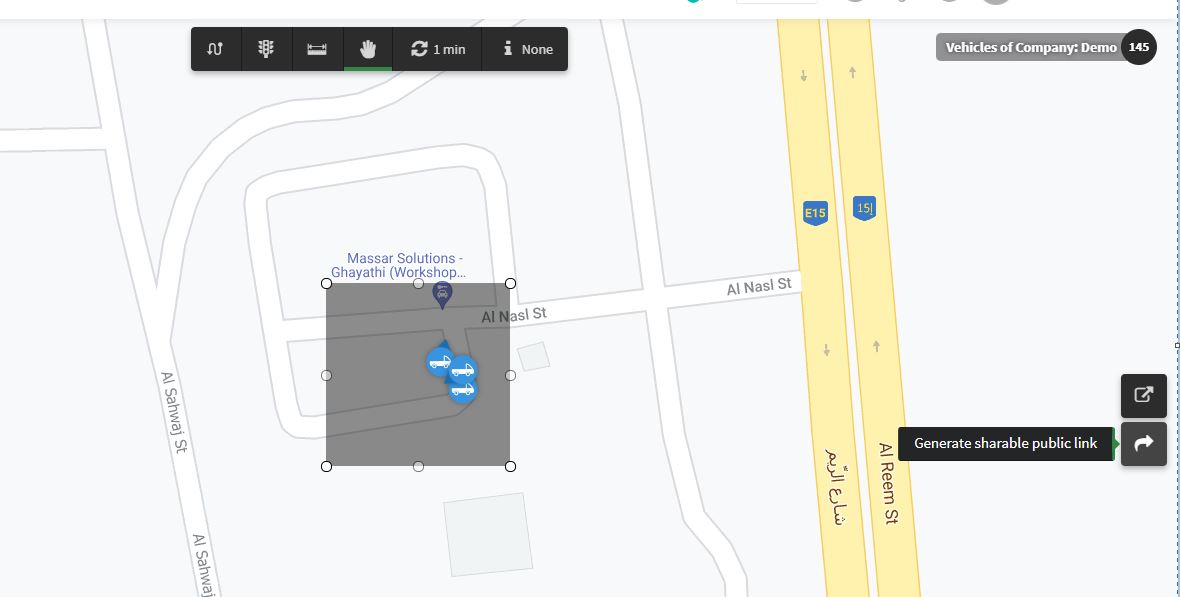
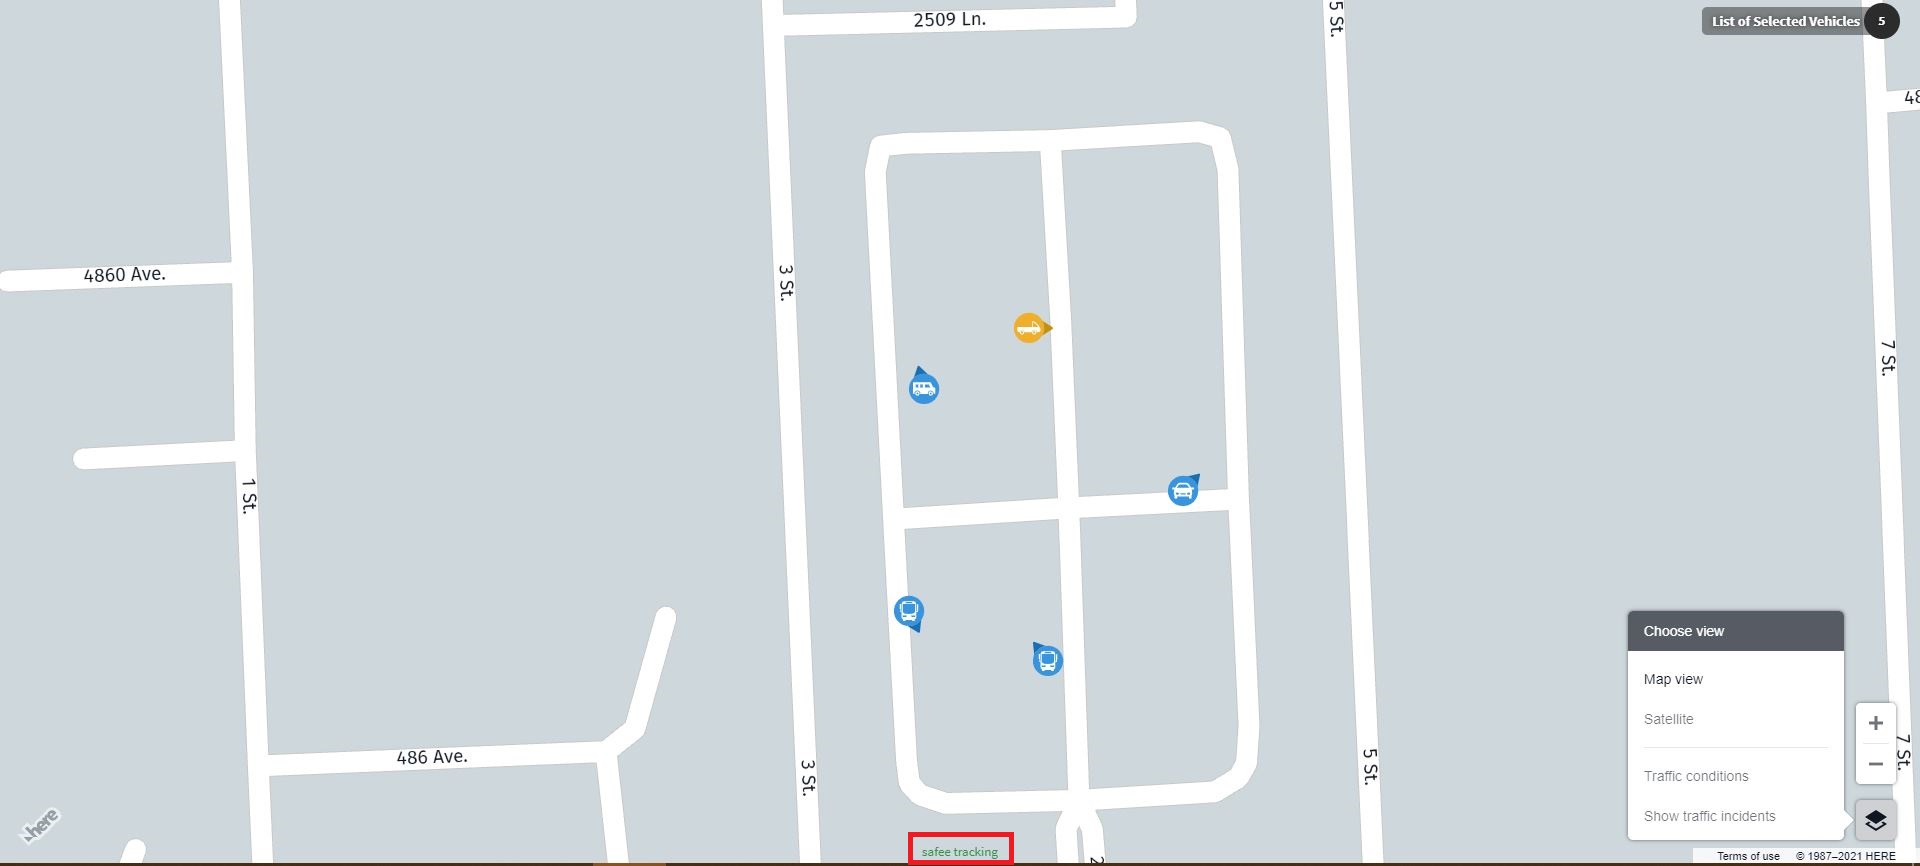
b. On the map: after selecting group of vehicles (using “Start Selection” tool on top of the map), you’ll get new button to generate a public link for them- as shown below.
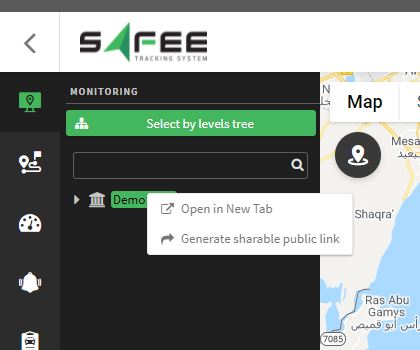
c. From the company tree: you also can generate a public link to a company level by right-clicking on the target level on the company tree when using company tree mode — as shown below.
When you choose to generate a public link, the system will ask you to set the link validity (in hours). After the validity time elapsed, the link will expire and will be no longer available.
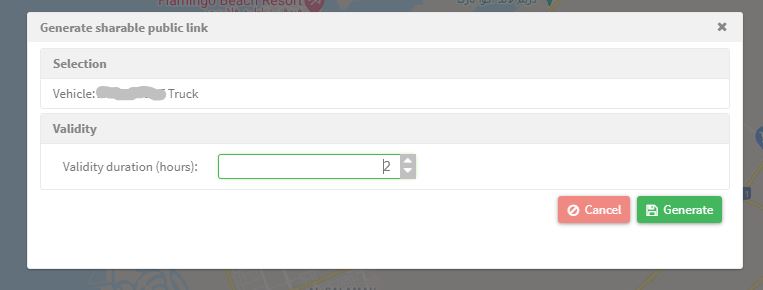
Good to mention here that when you generate a link and set its validity time, you can’t generate another link until the validity time expired.
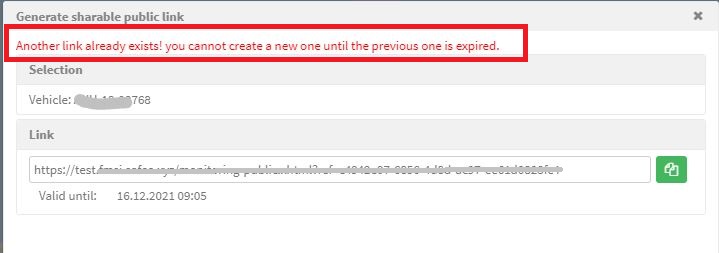
Once you have your link, just click on the copying icon to copy it and here we go! You can use this link in any browser and on any computer. And as always, you can visit our website to check what’s new through the link provided at the bottom of the map (the same link provided on the “About” page).
- Alarms Page enhancements: ============================
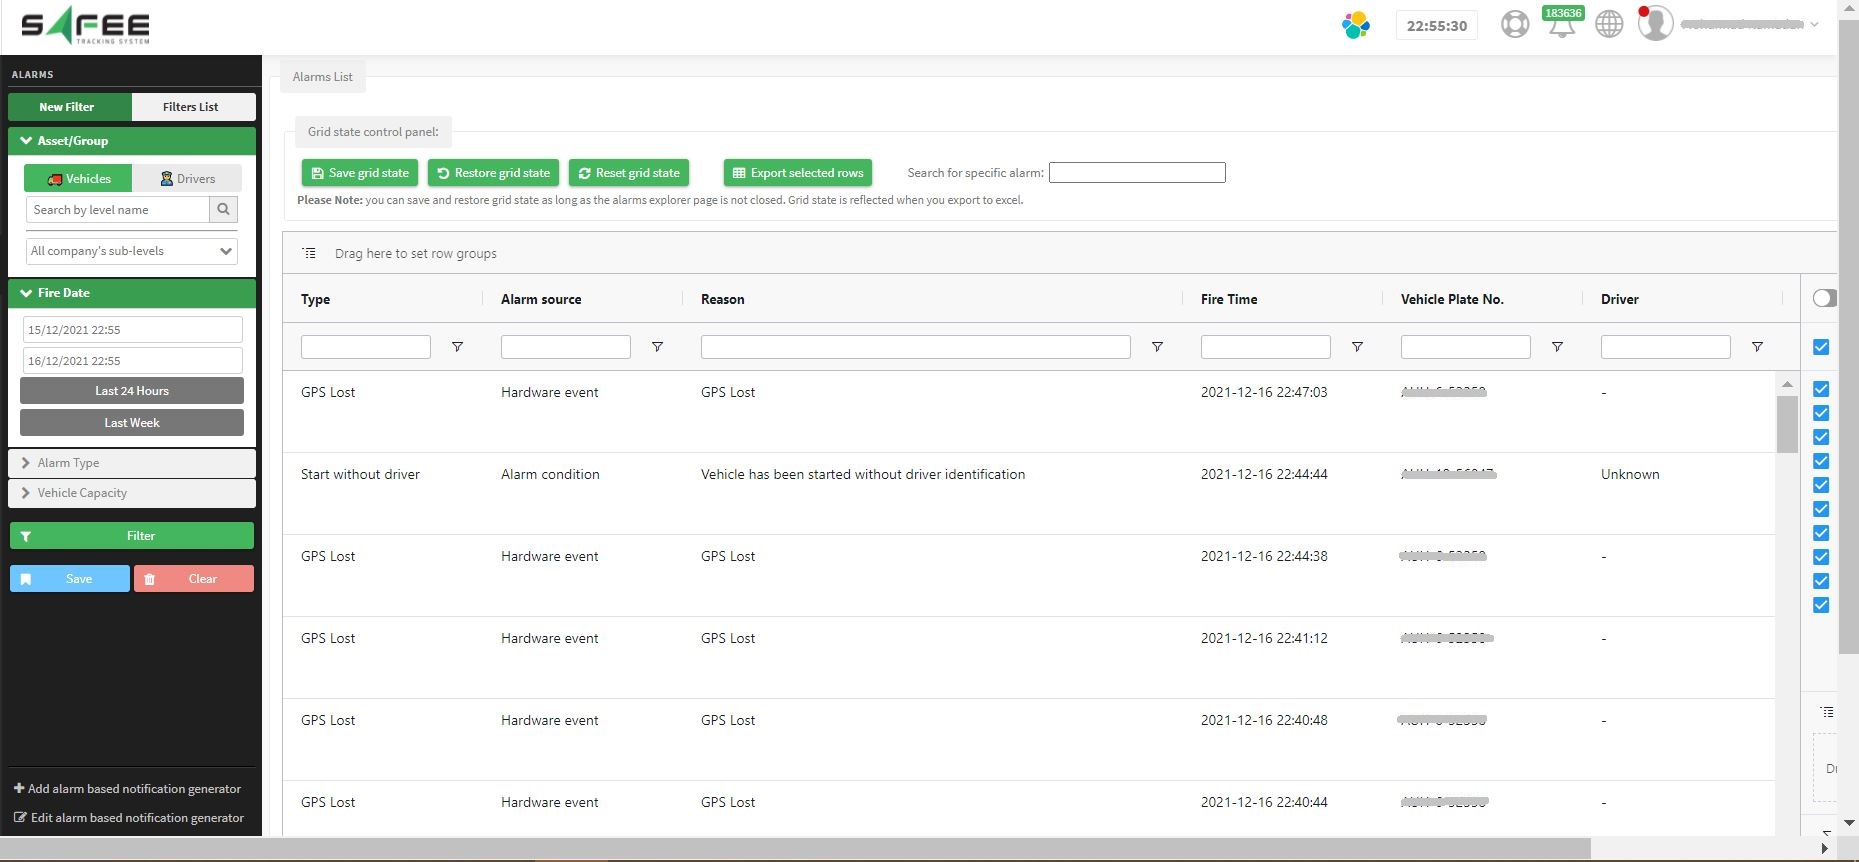
We introduce the grid view on the alarms page for a better alarm tracking experience. The alarms page becomes more flexible and comprehensive. Although you still have the same alarms table as before, you can now group your alarms by any column of the page and keep grouping as much as you need to get the most convenient output.
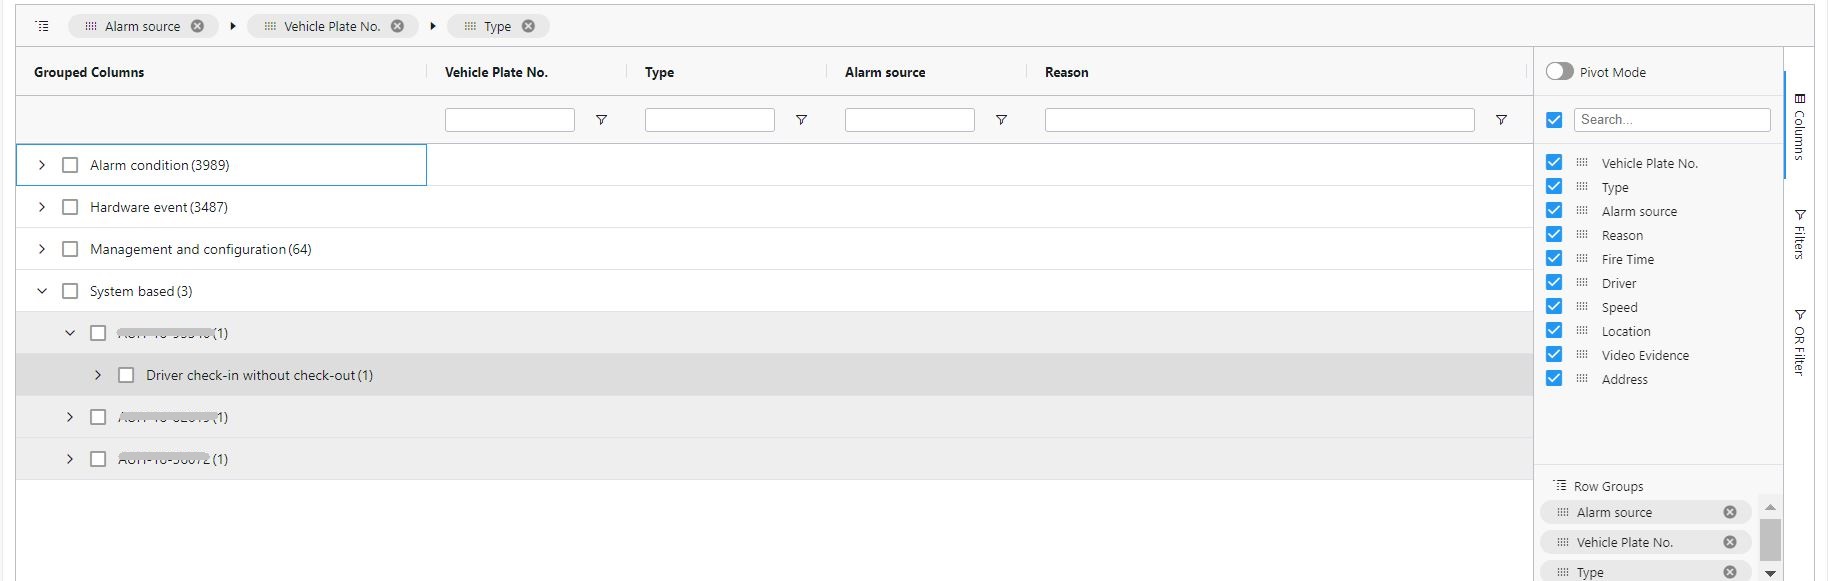
If you look at the example below, you can notice that the alarms are grouped by their sources as a first grouping stage, so we can easily reach the alarms that are fired by the alarm conditions for example or by any other source.
Then, the alarms are grouped by the vehicle’s plate number as a second grouping stage, so we can easily check how many alarms of each source the vehicle has fired. Finally, the alarms are grouped by their types so we can easily check what types of each source the vehicle has fired.
The grid view is as flexible as you need, you can group your output by any column you want, you can search for any word in the output, you can rearrange the columns by holding the column and drag it where you prefer, and change the column width.
In addition to all grid functionalities, we provided the page with more buttons to extend your experience. At the top of the grid, you find three additional buttons that help you in your alarm tracking. The buttons are as follows:

♦ Save grid state: is used to save the grid state as long as your browser is opened.
♦ Restore grid state: to restore the saved grid if you make more edits after saving it.
♦ Reset grid state: to return back to the ordinary default output whenever you feel that things went wrong and you need a step back.
{#GridGuide}Following are some of the features that the grid provides.
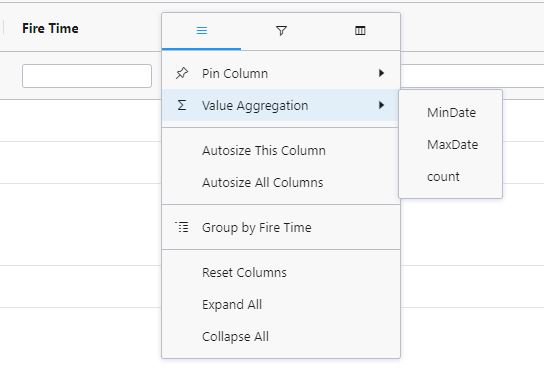
• Aggregation:
You have the option to aggregate the number and date values in the table. The aggregation functions for numbers are (Sum, Min, Max, count) and for dates (MinDate, MaxDate, count).
to do the aggregations, simply hover over the column name and a three lines icon appears, click on it. Once the menu appears, click on “value aggregation” then the aggregation function you want to use.
Aggregation is affected by the filters you use. So, as you filter for specific types of data, the aggregated values are changed accordingly, to include only the values of the filtered rows.
• Columns are draggable!
You can rearrange the columns while reviewing the result just by dragging the columns to the place you want, you can also pin the columns to the left or to the right also through the column menu
• Filtering:
You have three filtering options:
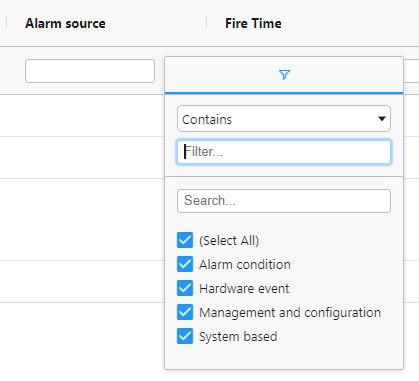
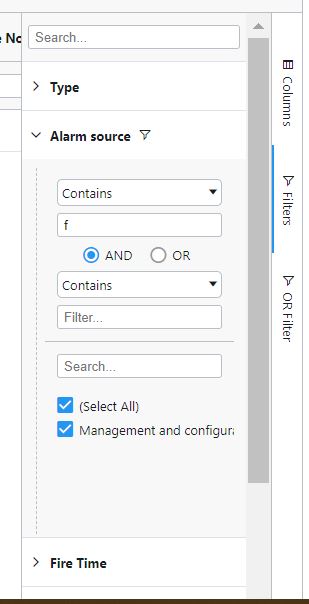
- You can use the filter in the column header (under the column name) or you can click on filter sign next to the filter text in the column header. If you clicked the filter sign a filter panel appears. In this filter panel, there is two types of filters:
The first lets you use an and/or expression for filtering. Just specify the first value (also specify an option like contains or start with …) and the expression operator (and / or) and then the second value same as the first value. The operator and the second filter only appear when the first filter value is filled.
The second filter on the panel shows all distinct values in the column with checkbox for each value. If you want to include or exclude any of these distinct values, just use the checkboxes.
- You can use the quick filter above the results table (input text area) to search data in all columns. Hit enter after you specify the search word.

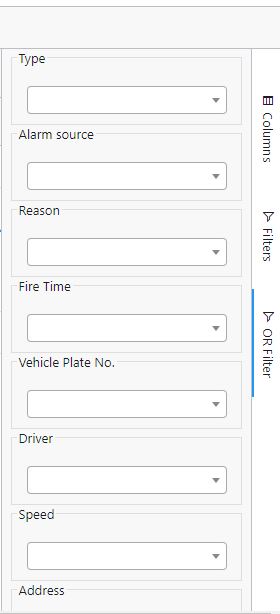
- Side bar OR filter: you can find for each column a drop down menu for all the distinct values in this column. Choosing a value of this drop down menu will generate a filter condition. The final filter expression will be an “or” logic expression between all these filter conditions.
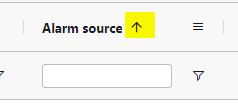
•Sorting:
Clicking on the header column will enable “ascending” sorting, clicking again will enable “descending” sorting, clicking one more time will disable sorting.
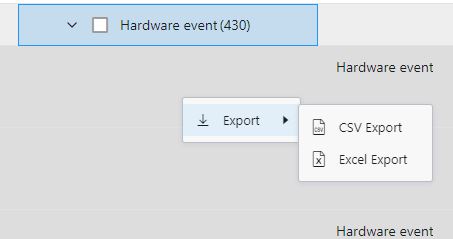
• Exporting result table:
- By right clicking on the table, you can export to excel or csv file through the option (Export -> excel /csv)
- Records selected though the checkboxes can be exported to excel through clicking on the button above the table (Export selected rows).

• Sidebar
- Columns panel:
You can hide or show any column through the checkboxes in front of each column name. There is also a section for grouping and a section for aggregation through which you can set grouping and aggregation options.
- Filters panel:
you can access column filters through this panel.
- OR filter panel:
You can use the or filter to generate a customized “or” filtering expression. Let us say you chose value1 from column A and value2 from column B. the filtered records would include all the records that satisfy the first condition (records with value1 in column A) or the second condition (records with value2 in column B).