5-3-4
Release 5-3-4
In this release, we introduce a new facility to “send commands” feature and some enhancements to the command’s history page.
- Bulk Custom Commands:
Sending commands is now available to the partner accounts! partners can now benefit from all commands featurs. in the following we list the new enhancements done on the commands pages that are applied to commands feature at the partner level
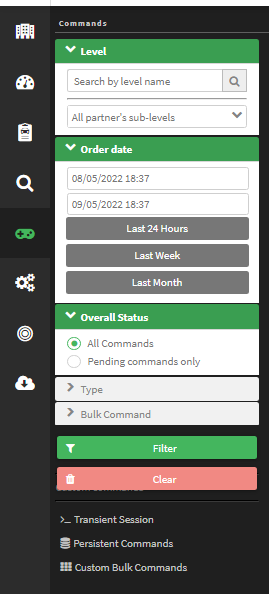
The commands history page is now equipped with more filters for more convenient use.
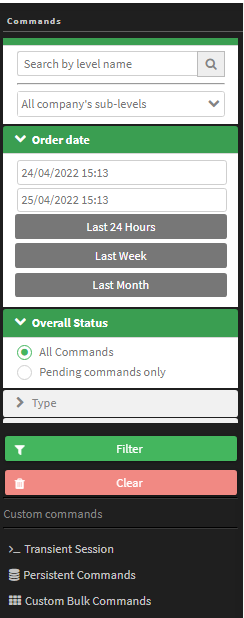
You can filter on:
-
A specific company level
-
A specific time range (choices of last 24 hours/ last week/ last month are available too)
-
The commands status (all commands or pending ones only)
-
The command type; a list of all supported commands is available.
-
A previously created bulk command to check its progress.
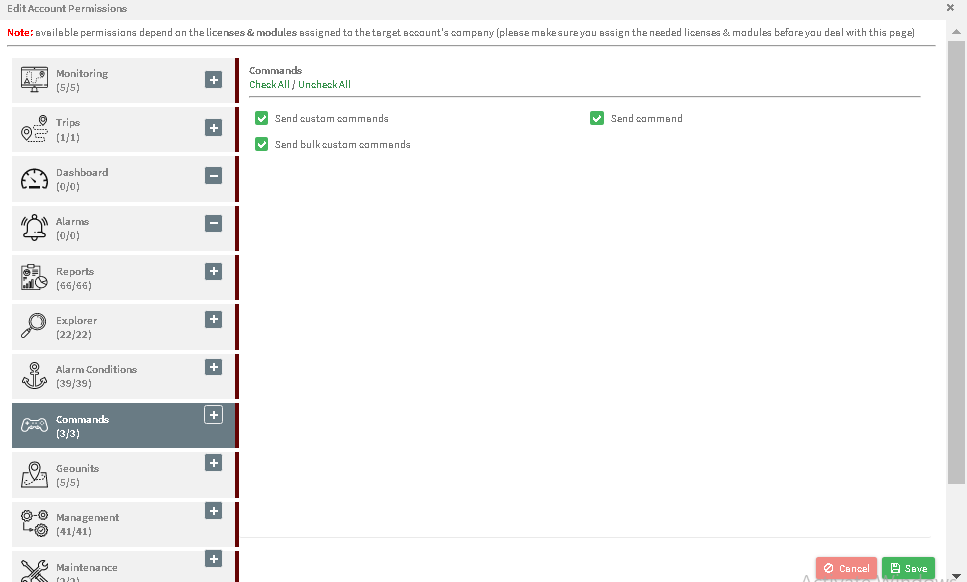
All the above-mentioned filters help you in checking the progress of a sent command. Now, what about sending commands? They still have the same robust features. You still can send a command via a transient session that enables you to send one command at one time and get the answer, or you prefer to schedule the command and make the system keep trying to send it until it succeeds or fails via persistent commands. In addition to those features, you can now schedule some custom command to be sent to many vehicles at one time. This is available via “custom bulk commands” page. Accessing this page is subject to a permissionon that should be granted to the account to be able to benefit from it.
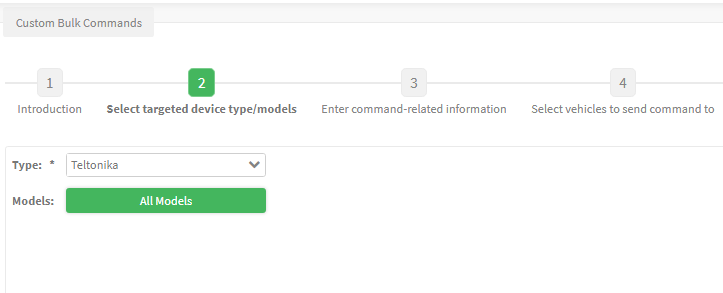
custom bulk commands wizard steps:

-
First step shows you some notes that you should take into account when using this wizard.
-
Second step is to choose the type and model of the targeted devices. You may note here that bulk custom commands sends the same command syntax to the selected devices; thus, you need to specify the type and model of the devices. When you select the device type, the system selects all models by default. If you need to send the command to a specific model, you need to click on the button “all models” to open the available models.
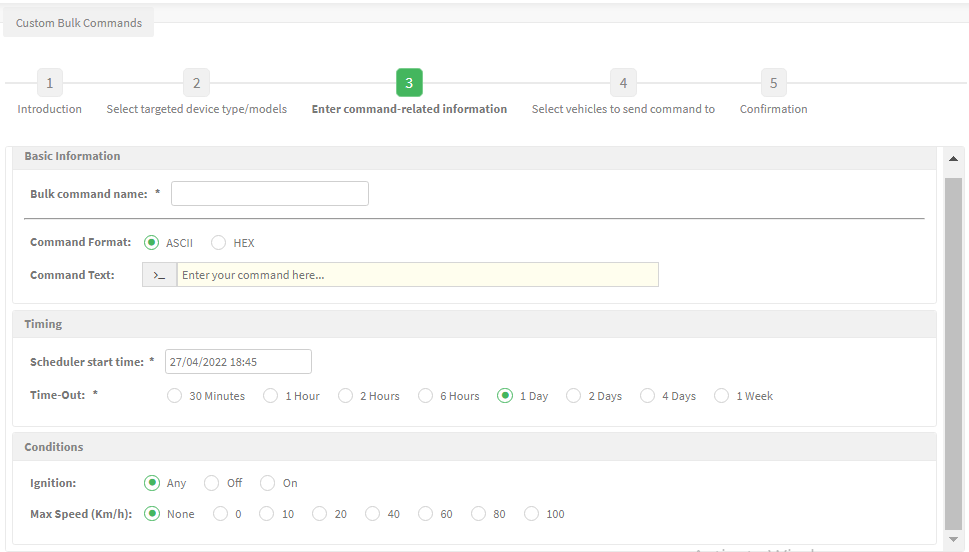
- Third step is to set the command along with your preferred conditions. In this step, you need to add a comprehensive name to the custom command you are creating so you can search for it easily on the commands history page. Then you can choose what format of commands you will use and insert the command text in the specified textbox. You can also choose when you want the system to start trying to send the command and for how long the system should keep trying. Finally, you can set some conditions on the vehicle status — as usual.
4. Fourth step is to select the target vehicles that have the device type you already selected
- And last step is to revise your choices and confirm
After confirmation, you can start scheduling again, go to commands history page, or go to home page
